Forging Ahead: The Big Picture
The anticipation before the fight begins is among my favorite moments in Halo’s multiplayer, particularly the drawn out opening moments of Big Team Battle. Players move into their initial combat positions, load up the vehicles, streak toward power weapons and seek to secure key choke points, all before any real combat has begun. On Valhalla it comes as players launch over the man cannon toward the center hill, and get a glimpse of the opposing forces likewise flinging themselves forward, before dropping out of sight below the hill. How long that string of players was, and how many team mates I had with me on the trip over, changed how those early moments played out. Charge straight up the hill? Flank it and toss the Power Drain due to being out numbered? They were the only calm moments of the match before the triple crack of the BR began its steady echo across the canyon, but I savored them. On Avalanche, the anticipation came in several places, as vehicles barreled out toward the center bend and infantry hiked up to the keyhole or hurled over the side man cannons toward the laser, not knowing what kind of resistance awaits. The early jockying for position is present on my favorite BTB maps throughout the Halo series.
Capturing that early anticipation was one of the core goals behind this first Reach map. When planning out a map, my starting point – as is likely the case for most – is to define the big picture features, the core structure of the map which will define it. On Valhalla, it’s a box canyon with bases on either end and a central hill to contest; Avalance a U-shaped map with a pair of choke points down the center, with man cannons and teleporters to aid infantry movement. Once a canvass is drawn that captures those kind of core ideas, I can go in and shape in the details upon it. In my experience, this stage of the design is critical, because if the foundation isn’t right, nothing that’s parked upon it will fix it.
For this first map – creatively dubbed BTB1 – I had a few big-picture ideas the foundation had to capture, the first of which was the aforementioned anticipation. It also needed to support vehicles, sans tanks and flying vehicles. Like infantry, I wanted vehicles to be able to spot an incoming conflict, and then have the freedom to course-correct around or even under (or over), rather than get funnelled toward the fight. This was one aspect of Avalance that I never liked, how most vehicles were forced into the central bend around the outside without an alternate route. I was envisioning three key vehicle choke points along the center, which would be few enough that controlling them would be advantagous, but not so few that one team could easily cut off vehicle traffic from the other team (again thinking of Avalanche, when one team had the laser watching the bend from their mega man cannon perch). Lastly, the choke points would be created by a large central structure which would break sight lines down the middle, have some routes for infantry to move between the levels, and enable some CQC.
I settled on a giant U-shaped map with a central clash line down the center of the symmetrical sides. To alleviate the issue of one team choking off the center, and to provide alternate routes, I included a second level above the first for both vehicles and infantry to move between. The bases would be settled on the outer rims of the map, visible to one another but far enough away that they could not yet engage until they’d come around the bend toward center. At the ends and at a few junctures along the way, the two levels would fold together, creating some the key control points. With those ideas in mind, I began laying down foundation. At this point I still wasn’t using precise object placement because I didn’t want to lock anything in, though I was making things smooth enough that I could conceptualize the space and test vehicle and infantry movement. The plan was to put down a flat test bed, then shape it from there.
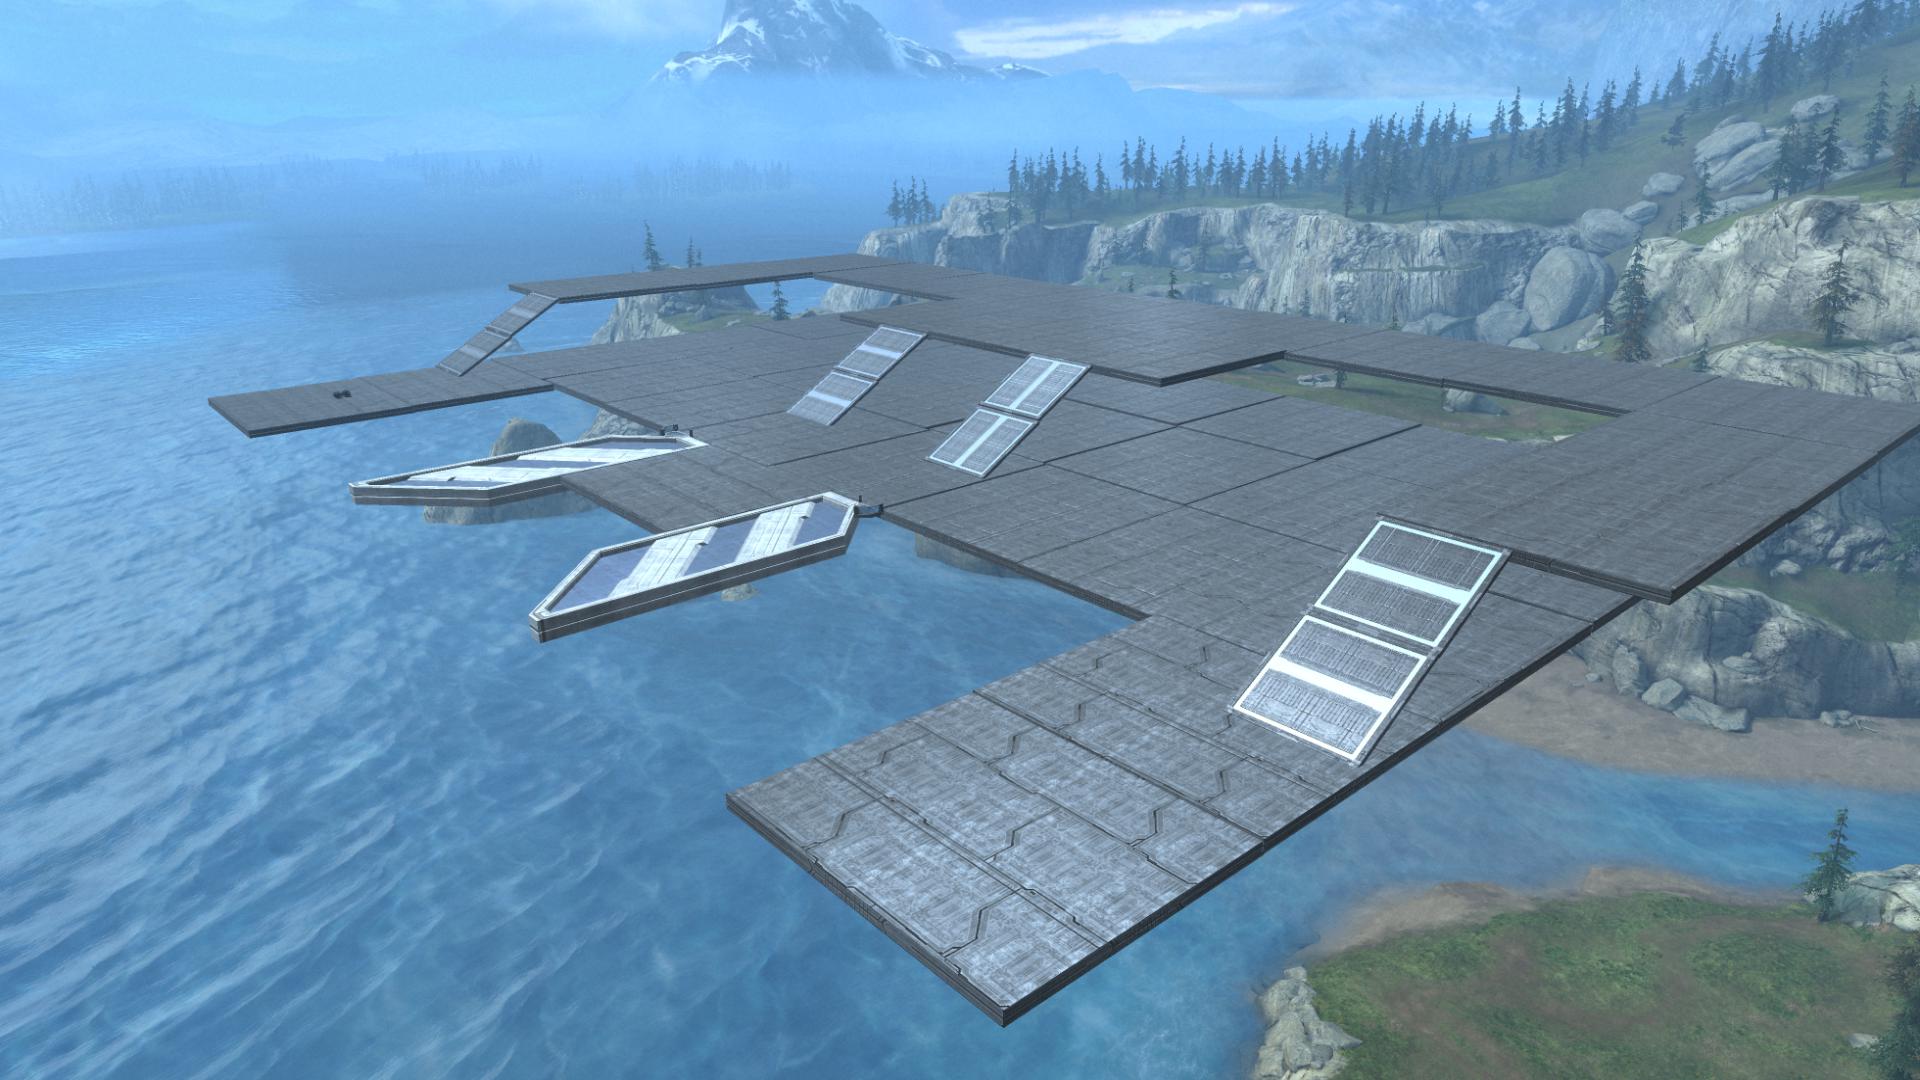
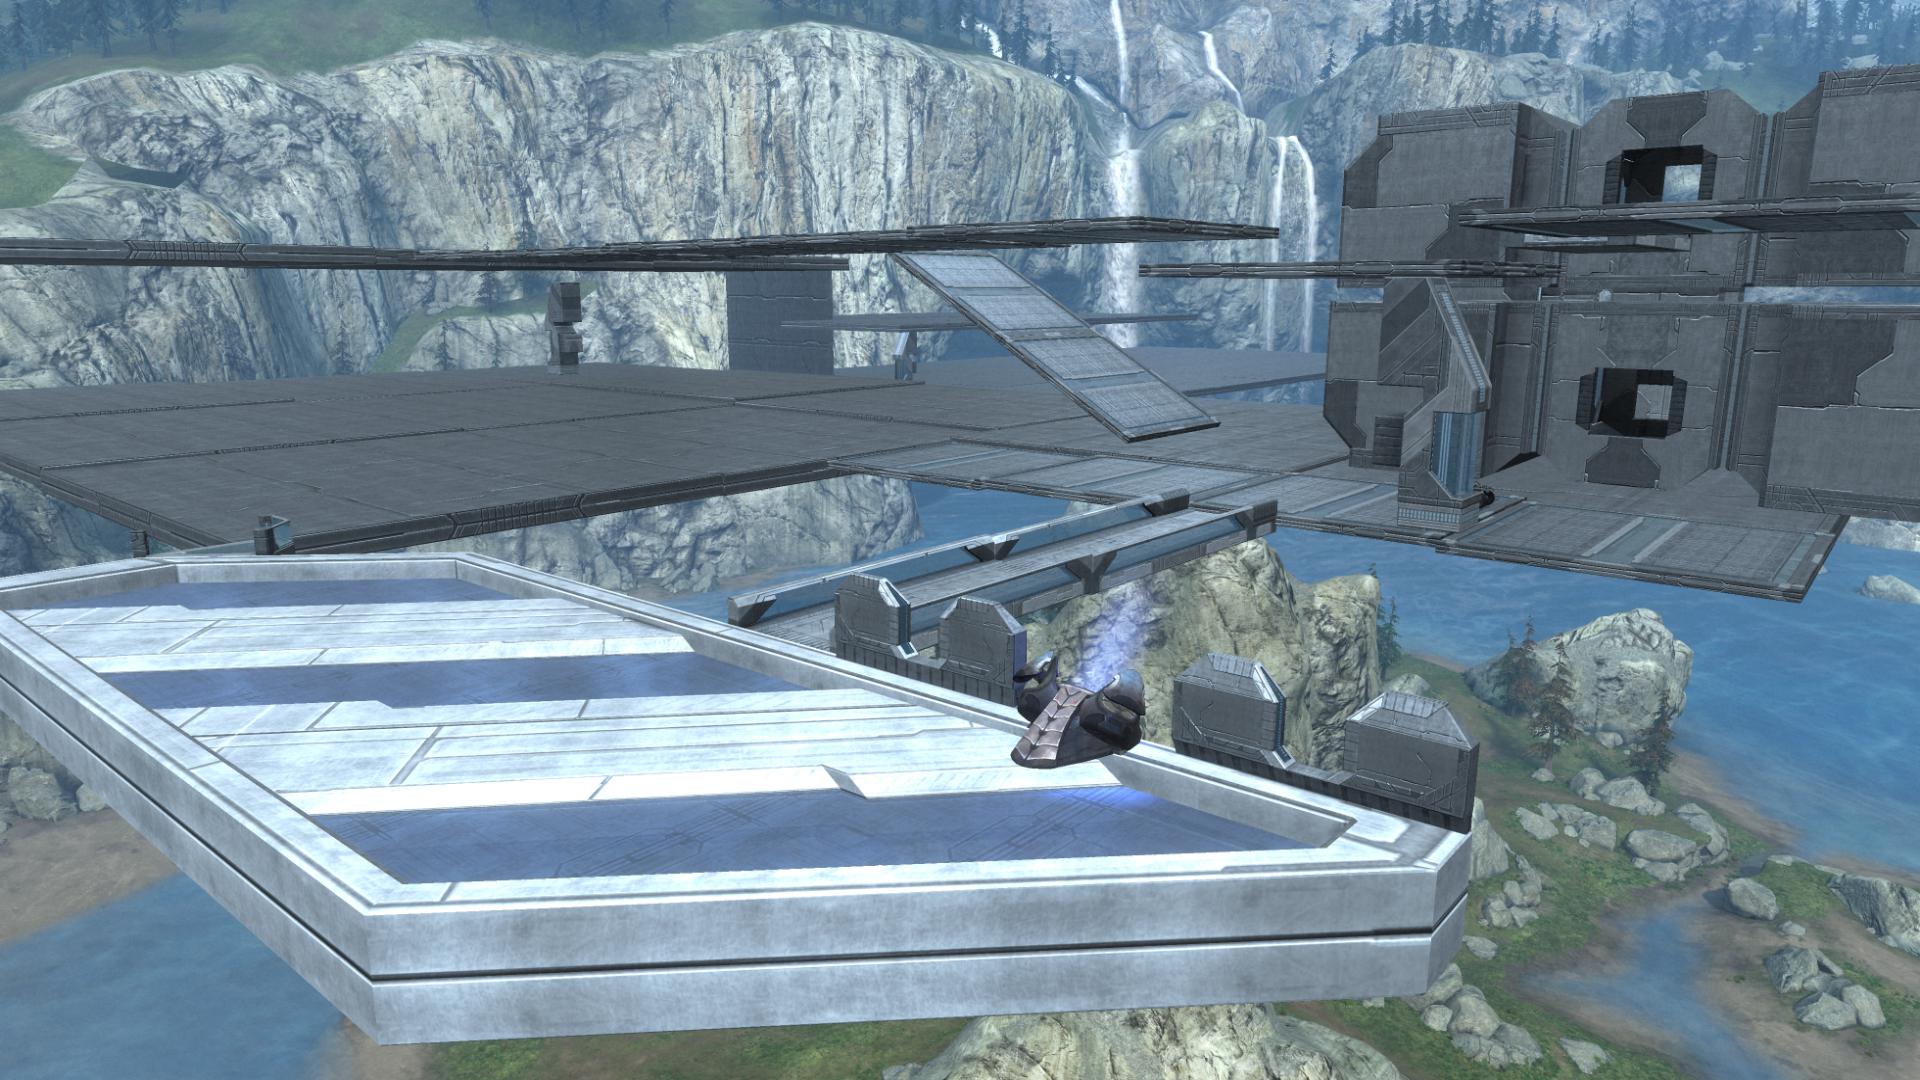
A few things jumped out after laying the foundation down. First, that was a heck of a lot of space – maybe even too much. If it was too big, infantry were going to have a long trek if they don’t have a vehicle on hand (Sandtrap’s epic desert marches are still fresh in my mind). The top level was too narrow – more like a giant bridge. And in laying down the placeholder ramps, it occured to me that providing the routes for vehicles to move between the levels was going to take up a lot of space. I’d have to be careful not to end up with a map filled with ramps. And lastly, preventing vehicles from falling off the side unintentionally would be a big issue, as that was too much border space to block off entirely.
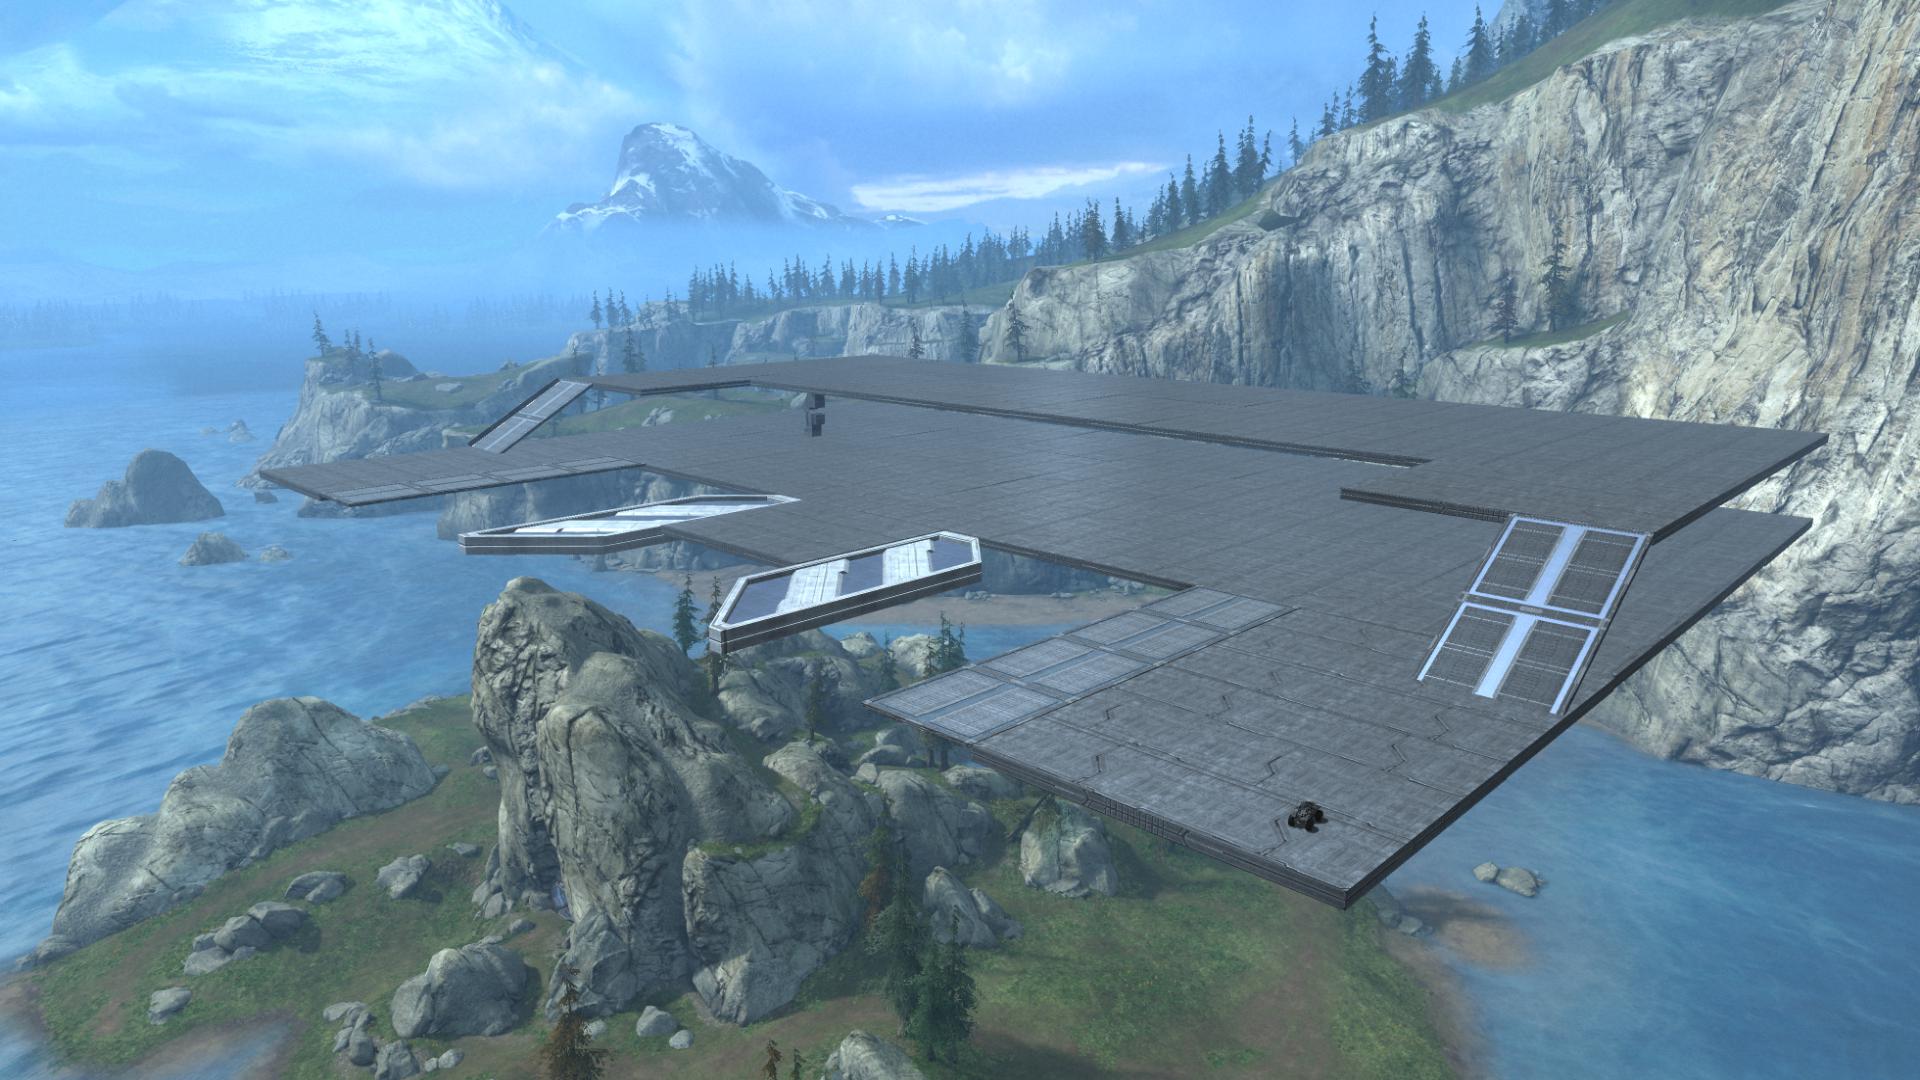
Despite the isseus I saw coming down the line, I was still comfortable enough with the concept that I made a mental note to address them later, and moved on to refing the shape. (Which, in hindsight, proved to be a very bad idea.) So I set about rebuilding the layout, with some tweaks, with greater precision.
At this point one quirk of the control scheme came to light. The UI allows the Monitor to rotate around a selected object, or to move it horozontally, while clicking the thumb sticks enabled a zoom or fine placement mode. Vertical movement meanwhile was relegated to the digital shoulder bumpers, which didn’t allow anywhere near the finesse as the sticks. My first attempt at getting two floor pieces to line up flat was a comedy of errors as one piece swung over and under and over the first.
After some poking around and inquiries around the web (aka, asking a question on a forum), I turned to the coordinate editing system. While I couldn’t move objects vertically with precision using the shoulder bumpers, I could get them close, and then nudge them into the correct location one tenth of a world unit at a time. I began noticing that despite using the precision of the coordinate editor, I wasn’t able to place some objects together perfectly, which was odd since they were built using a precise and consistent grid system to make objects compatible. Around the same time I noticed that when I grabbed an object that I had placed by hand and entered the coordinate editing menu, the object would shift slightly.
What was happening was simply rounding. While the UI enables the precise placement of objects by hand, the coordinate system moves in increments of one tenth of a world unit. When holding an object, if you enter the coordinate editing menu the game the game engine rounds the object location to the nearest tenth of a click on each axis, snapping it neatly into the grid system the game uses to save object locations. Once that realization hit, I’ve used the coordinate editing menu to place every object since. Even when I have something placed perfectly, I pull up the coordinates menu for that final nudge. Between the coordinate editing and using the rotation snap feature, I can line up objects with precision very quickly. This proved later to be a boon when I was making sure the two sides of the map were symmetrical.
With the right technique, I was able to quickly rebuild the core layout, with some tweaks, by taking down one half of the rough version and reassembling it with precision, then repeating it for the other side.
Once the rebuild was done, I set about massing out the major features of the map, testing out object size while marking the space that each feature would occupy. Namely, the bases and the central structure, which while sparse gave me an idea of how much space I wanted to fill in.

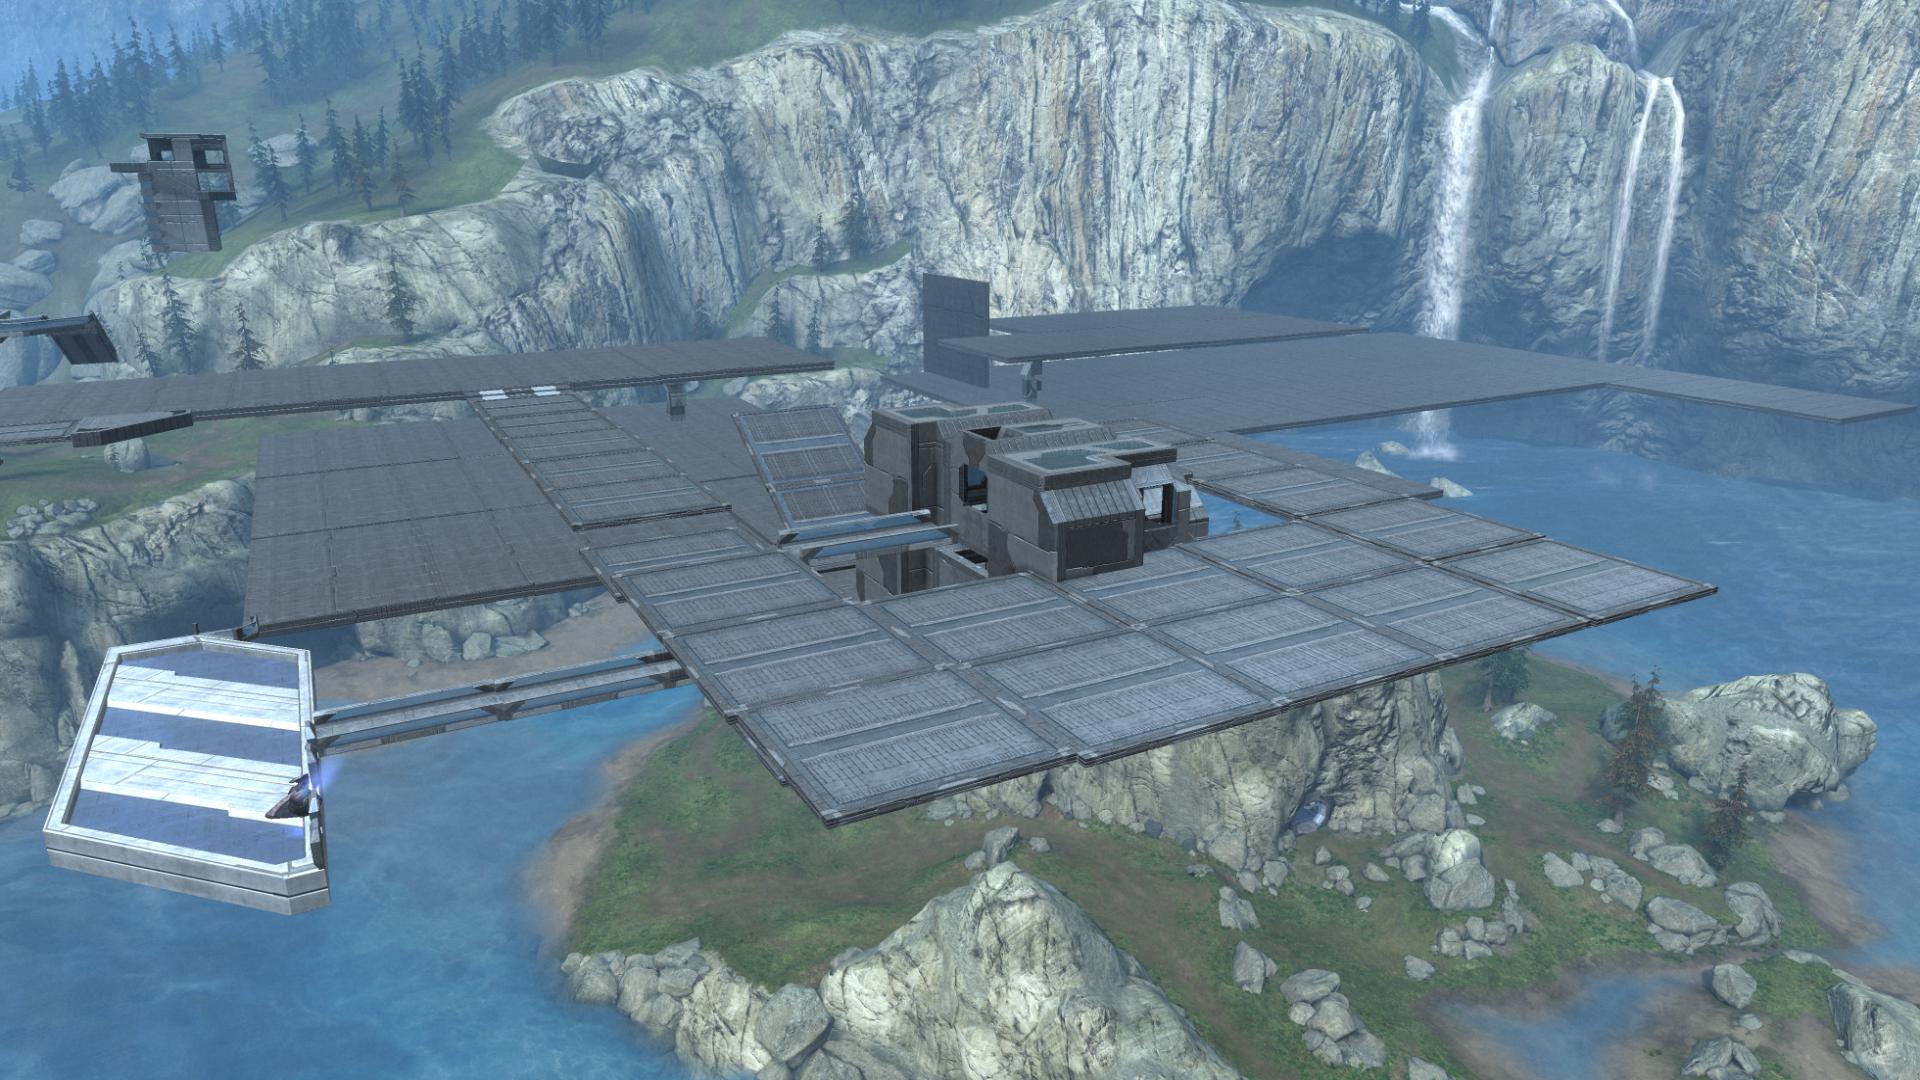
Now, I should probably mention mention that I have an aversion to the sniper rifle. Not just because I’m pretty poor at using it, even in Reach. But because I don’t like the effect it has on combat: dying instantly with no warning isn’t fun, and neither is being pinned down without any recourse. And from a design standpoint, it complicates spawn placement considerably, as I would need to make sure no one spawned within the sight lines of the primary sniping locations. But given just how big this map was, I couldn’t rationalize not including it. And so I marked out a primary sniper perch atop one of the key control choke points along the center. To balance it out, the perch would be very exposed to the DRM’s considerable range. But I’d need to take care to get enough cover down for infantry to close on the sniper perch without getting their heads blown off.
I try to be mindful not to fall in love with any first drafts – a lesson I thank my seventh grade English teacher for – but I liked the profile that the placeholder tower cut, with its arms folding down around its base, despite it being more sparse than the structure I had in mind. I began considering leaving it in place. Meanwhile, the bridge in back had serious issues and would need a rebuild (or two, or three) when I came back to do more detailed testing. With placeholders down, I evaluated the primary vehicle routes.
I decided to make a medium sized bridge on the outside of the U as a key juncture between the sides and the two levels. Placing it near the back would help push the active play space around the map, or so I hoped. The ramps along the inside and a straight passage or tunnel either above or below would provide the other ways through. I was debating leaving a path along the inner rim of the map for vehicles to try a straight, exposed shot between the bases.
At this point I began to think about something I should have earlier: the approach to the base. As a rule of thumb, I try to locate bases so they can be accessed from at least three directions at the macro level. Any less than that and a base is far too easy to camp, and enemy approaches became very predictable. An open map like Valhalla addressed base approaches by providing some cover on either side of the map for infantry and vehicles to use, in addition to the front door approach. Standoff , another flat, open BTB map went one further and provided for four distinct ways to approach the base, from either side, from the front, and from behind. But given that I had backed my bases into a corner, I was going to have to work around the constraint of having a base that could only be assaulted from the front.
The map I looked at for reference was once again, Avalanche, which had a similar U-shaped setup and the respective bases backed into a cliff side. To give some options to the base assault, the designers employed the the kitchen sink approach to infantry movement: teleporters and man cannons (for infantry as well as vehicles), in addition to low and high infantry entry points to the base itself. The teleporter provided a crucial “back door” entry to a base that had no backdoor.
Without any other options, I somewhat grudgingly decided to use the Avalanche solution, and positioned a man cannon outside the front door, and planned a teleporter in and out. The use of a teleporter helped me define part of the map, as I could devote the far corners to being a teleporter room. This helped to give the rather distant locations a use, and would help infantry move through the map more quickly. I placed a couple of buildings down to rough in the space the base would occupy and began testing man cannon approaches from the “fins” on the inside of the base.
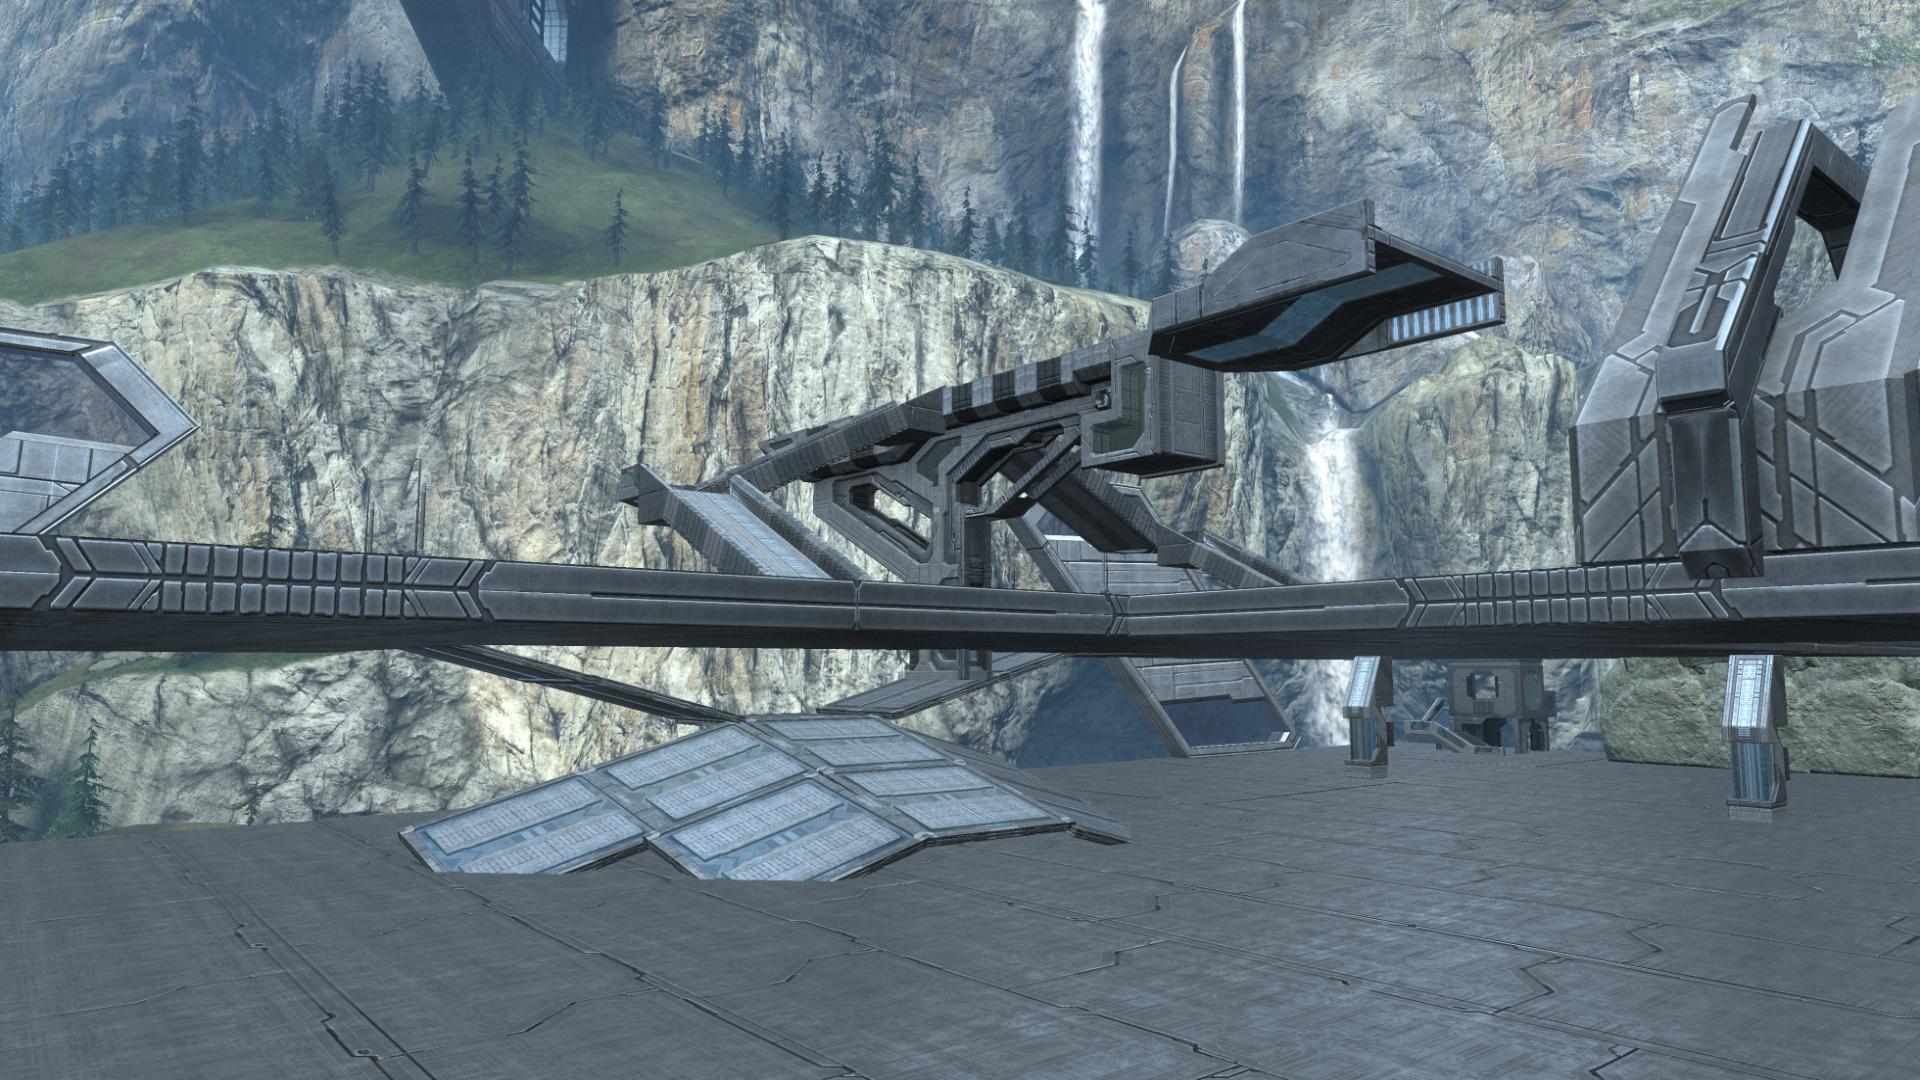
At which point I realized I needed to lower the top level in order to make the man cannon work; dropping it down from my arbitrary placement to the same height as the Strut object worked perfectly; I used a strut as the measure so I could place them without having them stick through the floors. And it provided a direct way up to the second level of the base, where I was considering placing the flag.
With the groundwork done and placeholder objects in place, I plopped down some vehicles and began giving the map a thorough test drive. Which – as I suspect most readers have gathered from the pictures alone – is where the design’s myriad gaping problems came into focus.
I make infection maps. There real fun. And your real cool.
I hope this turns out better than Crossroads did. It seems like an interesting layout. Keep it up. Maybe my forge lesson on my blog will help you perfect the map design wise… lol.
I hope this turns out better than Crossroads did. It seems like an interesting layout. Keep it up. Maybe my forge lessons on my blog will help you perfect the map design wise… lol.
Great read dude.